Wednesday, 25 March 2015

Evaluation Activity 8

What targets will you set yourself for G324 next year - when you will make a trailer?

This year I am proud of how much I have learnt and achieved, showing progression in my work. For example, when I first begun I had very limited knowledge on the technology we had to use such as Adobe Premier Elements and Photoshop, but after watching YouTube videos and researching about how to use these it allowed me to gain a stronger understanding for our opening two minutes. This was effective as through this it allowed me to produce a high quality trailer by adding transitions, cutting scenes to make seamless movements and adding audio in the background providing tension. As well as this I learnt new terms and put them in practice when analysing YouTube trailers, learning about the film industry and learning new camera techniques. 
Even though I have gained a better understanding on many things this year, I still have a lot to learn next year to progress. For example, in A2 when producing our second trailer there is a lot that we can do to make it more advanced to the one we have made this year. Firstly, we will plan our trailer earlier as in this case we filmed it last minute which meant that when we looked over our trailer and we want to re film our ending we had no time to do this due to the deadline. Secondly, I would like to get more involved with the editing of the trailer. I done a lot to participate in the trailer but as we worked in a group of three all of us limited certain knowledge as we all done individual tasks. Next year I can achieve this by working by myself. Our trailer was based on a horror genre so next year I would like to mix it up to a Romance. This would consist of following different codes and conventions which may be interesting to get a deeper research into, especially because it is my favourite genre! The four main focuses that is a bit part in our trailer consist of camera composition, mis-en-scene, editing and sound. Next year I could progress on all these areas which would improve the trailer significantly and could result in a higher grade. For example, for camera composition we could add more complicated shots and shots that are mainly used in that genre, shots such as match on action look effective but are simple once you edit it correctly and tidy. The mis-en-scene is always quite an easy convention to follow as you can take a variety of ideas from other trailers in your chosen genre. In our trailer this year sound caused many problems when trying to put over our trailer. For example, we had to match the sound exactly to our trailer to create that build up and suspense in the right areas. This was extremely time consuming as it was a tricky task but with a bit of help we as a group succeeded!
Besides all the stressful and tricky situations with the trailer and technology I found this a great experience and real achievement to make a high standard trailer, giving me an insight into what the media industry can be about!

Tuesday, 24 March 2015

Evaluation Activity 7

Looking back at your preliminary task, what do you feel you have learnt in the progression from it to full product?

When looking back at our preliminary task you can see obvious differences between that and our trailer. For example the mis-en-scene, camera composition, editing and sound. This is due to one being filmed with a much longer time allowing us to make it more advanced, compared to the preliminary task which we were new to and had very limited time to do it involving no planning. With the trailer we were introduced to Adobe Premier Elements and different editing techniques. This allowed us to improve our trailer by adding transitions creating effect, adding music, turning up/down dialogue making certain parts more dramatic and finally cutting shots for a more polished look. Due to not having this technology in our preliminary task we were more vulnerable to jump cuts and a less professional look. Once gaining more knowledge about different types of shots, we could then use them in our trailer to cause tension.


In our preliminary task we used match on action. Here is a close up shot of one of the characters opening the door, then the next shot is the character walking through the door, continuing her stages. This practice allowed us to use match on action in our actual trailer. As you can see, the victim Charlotte has a close up of her getting her earphones out, then the next shot is from a side angle of her putting the earphone in. We then edited this in Adobe Premier Elements to make more seamless movements following the continuity rules. We used match on action as it emphasises that certain moment made by the character and makes it even more dramatic. For example,with our trailer it focused on the earphones which in this case creates tension as the audience felt a sense of worry in case she couldn't hear her surroundings which we knew were dangerous; this makes the victim even more vulnerable.


In our preliminary task we used the 180 degree rule. Although we never used this in our trailer due to our genre and specific scene it still taught us to be more careful about the camera angles making our trailer more successful. We felt that by not using the 180 degree rule was a good choice as we were not confident enough about it and didn't want to make our trailer look inexperienced which subverts to match on action as we found that was efficacious and simple to use.


As you can see in our trailer we have improved our camera shots by using a wider range. Here is an over the shoulder shot. We used this as it allowed the audience to see what the character can see when she suddenly hears a noise. It would get the audience engaged as when she turns around will somebody be there or not? As well as this it shows the location and the fact that nobody is around. It could add enigmas. If its quiet why is she hearing noises?

Here we used a long shot of a two person shot. This proves our progression and knowledge on more wider range of shots. For example, we used this two person shot as it was when the antagonist and victim first met. This alerts the audience that the victim is not alone and trouble is just around the corner. As well as this when it reaches the climax and the antagonist is introduced again the audience is shocked as they recognise the antagonist due to this quick shot that they thought meant nothing.

Overall, from the preliminary task I found that I did learnt a lot due to incorporating certain shots, allowing us to work as a team and practicing using the camera to make certain shots look more high quality allowing the audience to make assumptions. For example, using a high angle shot to show the little power a character has. As well as this it mentally allowed us to feel more confident when filming our trailer and improve or practice any mistakes.

Friday, 20 March 2015

Evaluation Activity 6

What have you learnt about technologies from the process of constructing this product?


The main technology that we used for constructing our movie was Adobe Premier Elements on PC. With this we could do a variety of editing to make our film look more advanced and higher quality, it was an extremely successful tool that helped us out as a group. However, it did take a lot of time getting used to as we found it quite complicated at first but once we started to get more understanding about it we found it fun and enjoyable to use! Abode Premier Elements allowed us to trim our individual clips and place them where we wanted which provided seamlessly shots cutting from one to another. This is efficacious as it allows the audience to benefit from the good quality as if it had increasingly noticeable jump cuts this would make the film less successful and not enjoyable to watch. Adding transitions made links with the cutting as it was just different techniques which we used to cut from and to. We used the fade in and out transition with the credits as we it made the film look more skillful. As well as this we could add soundtracks in which we edited to fit the the film helping us to create the build up and reach the climax at the right time, making the audience feel the spook from the film as the music we chose created an eerie and ominous atmosphere. When creating the titles it allowed us to follow the codes and conventions of a horror as we could choose background colour, a type of font, and the font colour. We researched horror titles helping us to develop a similar title. Overall, this helped adapt our film to its final product, looking experienced and polished.


We used a Canon 1200D camera, this was one of my friends in our group. This came to an advantage to us when filming as due to the high standard quality and the certain qualities the camera could do it provided a more professional picture for our film. One out of many qualities it had was manual focus, this allowed us to change the depth of field, blurring the background and have a sharp focus on our chosen object/character/surrounding, this could have provided tension and suspense at certain points of the scene. Using the camera by hand allowed us to incorporate effective shots such as high and low angle however, in some shots it would have been useful to use a tri-pod as it would've allowed us to create steady shots.  From this experience of using different technologies and doing all our research next time we can provide an even more experienced and better film.

Wednesday, 11 March 2015

Evaluation Activity 4

Who would be the audience for your media product?


As a group before making our film we decided to make the target audience 15-24. We chose this specific audience as when doing research on a few horror movies we looked up what age category was mostly likely to watch that horror movie and these were the most popular ages. This will then enable our film to be more popular with a wide range audience that appeal to horrors. This type of audience may be popular as we know young teenage boys and girls are most likely to go in groups and watch a horror movie as they love the adrenaline of being frightened. Our audience enjoy horrors that contain a lot of suspense which we tried to succeed in our opening two minutes with the build up and eerie music trying to create as much spook and tension as possible. Due to the audience consisting of quite young ages the shops they like to shop at are Topshop/Topman, River Island and New Look. These shops allow them to keep up with the latest fashion trends at school or at work which could be important for this type of age group. They love listening to a wide variety of music ranging from opera to pop. Finally the last bit of information we understood about our audience is that their favourite horror movie is Taken, this is because they were attached by the story line of the girl being kidnapped and the dad on a chase to save her. Taken was the movie that inspired us and helped up with some initial ideas in our film and who we tired to base our victim around. 
I think that this target audience would watch our movie as we done a lot of research and planning to try and follow the codes and conventions of some of the most popular horror movies for this age category. We believe we have made a successful eye catching film that contains a lot of suspense and shock that some of this target audience may be able to relate to or even feel empathy for the characters making them more engaged. To make sure our movie stands out and is noticed by this audience we would use social network which is extremely popular with this age group.

Tuesday, 10 March 2015

Evaluation Activity 3

What kind of media institution might distribute your media product and why?
Directors commentary 


Wednesday, 4 March 2015

Evaluation Activity 2

How does your media product represent particular social groups?


The key character I have chosen from the opening of my film is the main character Charlotte who plays the victim of a school girl walking home and getting kidnapped. When examining this character we thought about characters from other films who the character was similar to. We aimed to look at films with similar genres such as horrors and thrillers to get a more accurate match between the characters. After researching these genres we came across Taken, we then chose to compare the female victim from this film. We found this was the best match as it is a storyline about a teenager girl who gets stalked and then attacked leading to upcoming events in the film providing more action based around the character which is the same with Charlotte. They both provide suspense and tension and help female audiences relate. This is because young female audiences will feel sorry for the girls as they could possibly be more open in putting themselves in their shoes due to them being more vulnerable to being taken in real life. This would especially make the female audiences more horrified and shocked when watching. However, this would make the male audience interested and engaged in the film but with different intentions. For example, they could be attracted towards the female characters as they provide the eye candy of the film. This is known as the ‘Male Gaze Theory’ and influences male audiences to watch a movie e.g. Megan Fox starring in the transformers influences more males to watch the movie. Another similarity of the two female victims are that they have similar costumes. As you can see Charlotte wears a school uniform and the victim from Taken is wearing comfortable clothing that a teenager would wear; both of these costumes would help the audience recognise the characters as teenagers. If you look at the screengrabs you can see from the close ups of their facial expressions that they are both expressed as vulnerable which is a stereotype for teenagers. Both characters are placed in irrecognisable settings as Charlotte is placed in a forest providing a more threatening atmosphere and the female victim In Taken is placed under the bed waiting to be found and grabbed providing more suspense. The differences with this is that the female victim from Taken links more with Takens genre of a thriller as our opening is just a horror so the setting we have chosen is much more fearful and relates more to our genre, which could mean our film is most likely to face more horrific events as the thriller could contain more action. As well as the characters both being placed in irrecognseable setting another difference is that our character Charlotte is placed in more of an open space where she is open and surrounded by danger however, anything can happen such as somebody seeing her being attacked. This helps keep the audience on the edge of their seats. With the other female character she is in a more private setting but is still surrounded by danger in her own home which we would expect her to be safe in.

Tuesday, 3 March 2015

Evaluation Activity 1

In what ways does your media product use, develop or challenge forms and conventions of real media products?


The first frame is a low angle shot of the victim walking past. This shot is quite ominous due to the low key lighting as it is quite a shadowed shot introducing the audience straight to the codes and conventions of a horror genre due to the surrounding of the gloomy forest. The low angle shot creates a mysterious effect as you cant see the victims face making the audience feel anticipated to see more. It also allows the audience to see the surroundings of a forest which gives them an understanding that she could be in danger. Again, just from this opening shot we can tell she is a vulnerable school girl and something bad is about to happen.
The next frame is a close up of the victims face; as you can see her facial expression represents frustration as she bumps into a man walking, this is what we know the antagonist. The antagonist is introduced in a subtle way with his head down and hood up hiding his identity adding enigmas for the audience. Who is he? Why is he so mysterious?. This shot also captures the logo on her shirt confirming to the audience that she is a school girl on her way home straight away introducing the young teenage girl as exposed and defenseless. This frame creates a lot of tension because she carries on as normal and even puts her ear phones in. This creates tension as the audience may be anxious that she wont hear the antagonist.
Linking in from frame two the third frame shows match on action as she puts her earphones in expecting to be home shortly. The effect of this is that the camera shot changes creating more suspense, we see a close up of her taking her earphones out, then of her face as she is relaxed, then as the camera tacks her from behind we see her suddenly turn around in a medium shot with her face full of worry.
The next frame is a high angle shot, this is effective as it takes all the power away from the victim making her look even more vulnerable than she is. It captures her looking back to see if anyone is there as she hears a noise, This helps the audience feel the sense that she is being followed and they may start to fee frightened for the teenage girl in this dark forest.
In the fifth frame the audience are shown a shot of the location, this is especially effective as we are shown this through an over the shoulder shot tracking the surroundings. As the girl turns around and sees no one she carries on walking home. The long shot allows a wider view of the location, again conveying the codes and convention of a setting of a horror genre.
The sixth frame is a shot with both the antagonist and victim in, the antagonist is standing in the background looking creepy ready to capture her. This shot is highly effective as it is the climax of the build up. As well as this it really shows the costumes of both characters with the girl clearly wearing a school uniform and the man dressed in dark clothing always looking so secretive. The boy being the antagonist and the girl being the victim follows the codes of conventions as males are known to be the bad guys and girls are known to be weak, helping other girls feel sympathy towards the character in this circumstance as they can put themselves in the victims shoes. The long shot of the antagonist makes the shot look eerie as we are shown the surroundings behind him and we can see this deserted forest with only him and her waiting for him to attack.
In the next frame this is a simple shot that is seen in many horror films. The victim falls over, slowing her down allowing them to be more vulnerable to the antagonist getting them, keeping the audience on the edge of their seat wanting to watch more.
The next frame shows the action of the horror, it is a two shot capturing the victim trying to push the antagonist off her.From this medium shot we can see her escaping this time, but its not the end. We can see how frightened she is in her body language as you can see her putting all her strength in trying to get him off her.
The final frame before the title is a close up of the victim screaming. The close up is effective as it emphasises how frightened she is as she screams hoping to be saved. This makes the audience feel sympathy towards her as she has very little hope and was so close to escaping. This follows the codes and conventions of a horror genre as she is kidnapped which is found in many horror movies allowing anything to happen afterwards. This then creates enigmas. What will he do to her? What will happen next?
Finally, the last frame is the title. We decided to put the title at the end as the audience have just watched the trailer and get a clear insight to what the film is about which will then help them understand and relate more to the title. We followed the more traditional codes and conventions of  a horror genre which is white capital writing on a black background, standing out, looking powerful and representing the dramatic event that has just happened. This is compared to red writing on a black background which was popular years ago.

Tuesday, 27 January 2015

Online tutorials for Adobe

For our film I decided to research online tutorials which helps you to understand how to add different effects and slides to your movie. By doing this it helps make your movie look more advanced and will help me achieve a higher grade.


The first clip I researched was how to add credits/titles. The first thing I learnt whilst watching this clip is what the three different types of titles were ranging from default still, default roll and default crawl. After giving definitions of them all it helped me decide which one I wanted to choose when editing my film. After this I then learnt how to change the font, size and spacing of the title to make your movie more appealing and appropriate for your type of genre. Here I would use the font I have chosen which is Felix Titling as our group found that is was most successful with the genre horror. Further on in this clip he continues about the text of the title, I learnt how to place this title onto your chosen background getting the final look of our title.


The second clip I looked at was how to add transitions, I decided to look at this clip because I wanted to get a better insight into how to make my movie seamlessly cut from one scene to another; the way I do this could help create tension and suspense which is the main aim until we reach the climax. I learnt about a variety of transitions such as: cross dissolve, center split, cube spin, flip over and many more. After this I then learnt how to apply this by taking your clips and trimming off each one allowing the transition to be smoothly cut. The next step would be to pick your chosen transition and place it in the center where these two clips meet, then adjusting the transitions lengths to suit your film and that is the final of how to add transitions successfully. 

Monday, 12 January 2015

Location Research

We have chosen this location for our horror film as it is a dark, gloomy forest following a footpath that is realistic for a walk home. It follows the codes and conventions of the setting being in the forest, making it clear that this film will be a horror. Just from these images you can connote that in the film it will help build tension with the medium and long shots of these pathways, only consisting of the victim and the antagonist, far away from any help while surrounded in death and danger. The curves off the pathway help
create everything to be more spooky as the audience do not know what is about to happen around each corner as the camera tracks the breathless victim running for her life.
Here is the second pathway that we chose to film on, this is connected to the image above however leads to a main road which could give the audience hope that there is a chance of survival. In the filming we plan to have the scene where she is so close to safety but he finally grabs her. However, this leads to a bit of action where the victim then escapes again creating a roller coaster of emotions for the audience and with the up beat music help creating extreme amounts of suspension and adds enigmas. Will she escape?

Props: The Villain


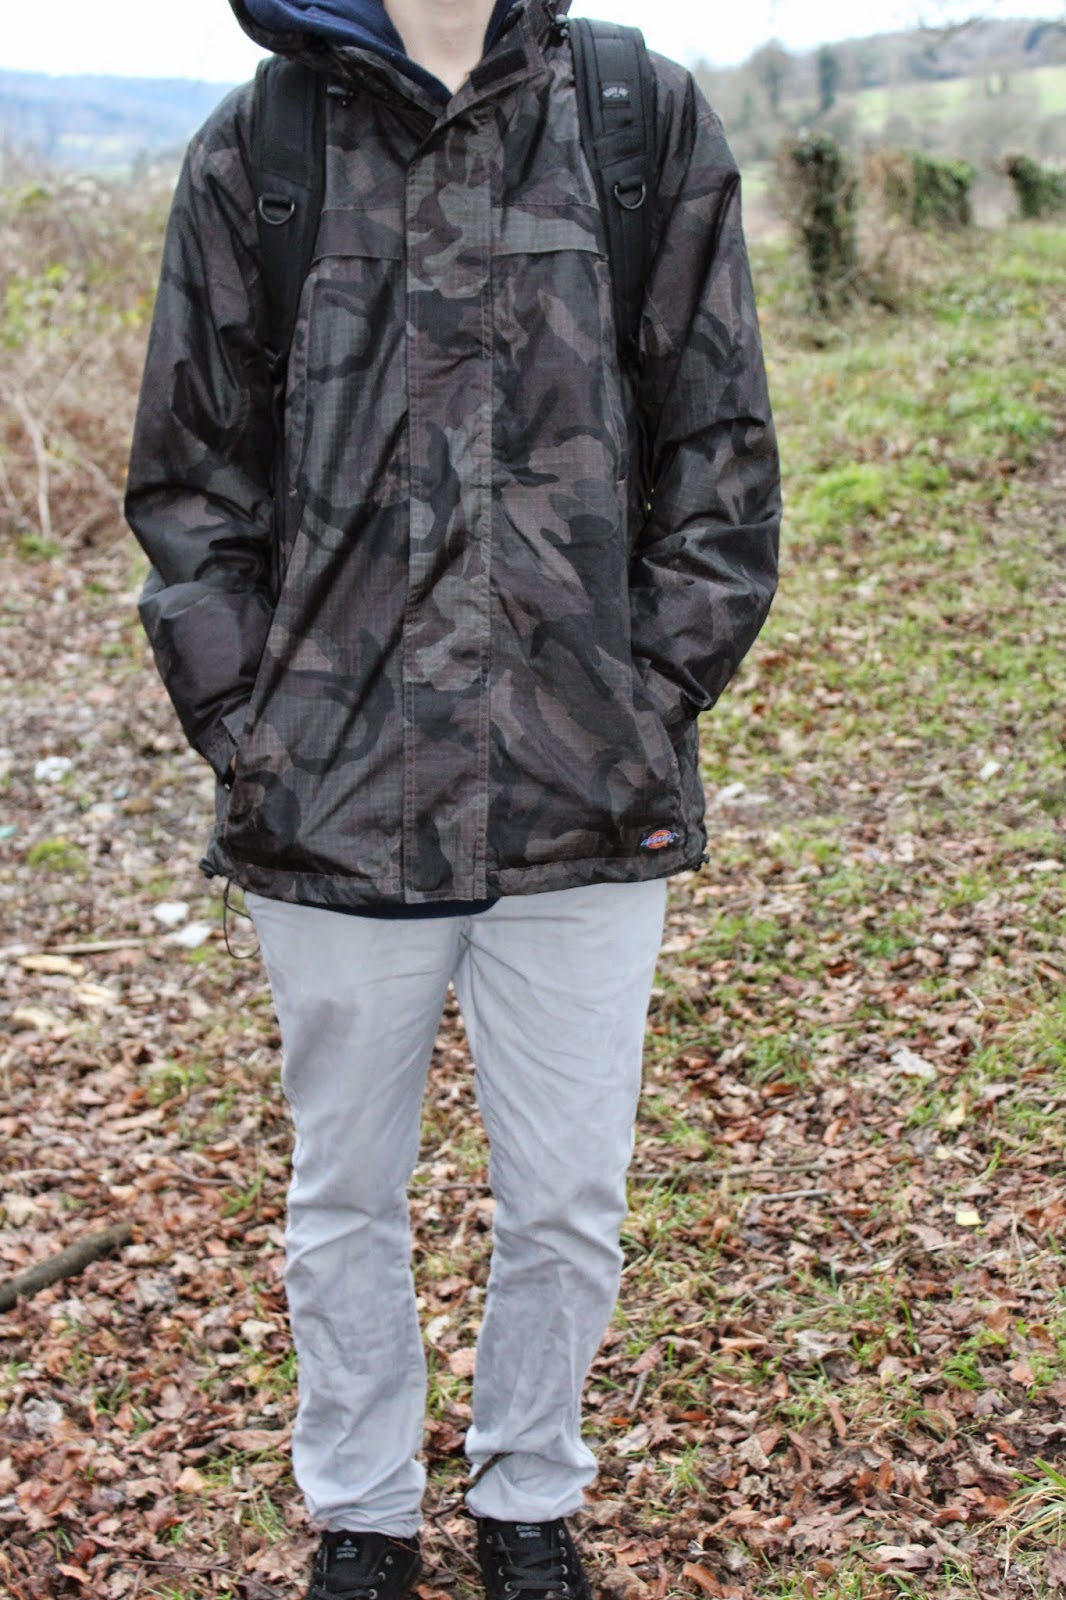
As you can see this is the antagonist, he is wearing simple and dark clothing with his hood up covering his face, making him look creepy but not too suspicious making the audience begin to think instead of predicting the whole trailer before any action was introduced. His hands being placed in his coat is effective as it doesn't give away any type of identity being mysterious. The dark clothing gives a more negative atmosphere as overall makes the antagonist look dark and gloomy. The bag then could add suspense when the audience is watching as they could use their imagination to image what could possibly be in this antagonists bag.


The prop we used was a usual black bin bag. This prop was used to slowly kill the victim, in a quick and quiet death. This was effective as using a bag to put over her head allowed us to use more close up shots of the outline of her face being pressed against thew bag, making it much more frightening. The colour black again connotes danger and darkness, adding to the mood of negativity.


Props: The Victim

When it comes to costumes you should have a very strict dress code on what the character should wear. This is because it enables the audience to get a clearer understanding on who is the victim and who is the antagonist. The costume can identify age and gender. For example, here you can see a teenage girl walking home from school. We know this as we can infer this from the school uniform and school bag. This follows the codes and conventions of a horror as it is clear there is always a stupid vulnerable teenage girl that takes the wrong paths in life, getting caught by the antagonist. This innocent girl walking through the woods, being followed by the dark antagonist would build more tension and suspense, giving off a more ominous atmosphere.


This is then a prop that we used in filming, we used a school bag as it adds to the realism of the situation of her walking home. We then use it later in the film when she is running away from the antagonist, she drops her bag which is effective as that is a usual codes and conventions, where the victim falls over, leaving something behind and enabling the antagonist to catch up with them.

Thursday, 8 January 2015

Target

Please add graphs/pie charts to evidence the findings of your questionnaire.

Saturday, 3 January 2015

Diary Of Filming

We have planned in advance as a group the dates we are going to film our opening scene. By planning in advance it means we will be organised and efficient. giving out roles will make the process of filming a lot more easier and fun.

Day 1: 28th December 2014
Today will be our first day of filming, we plan to start filming at 3.00pm and will try and film as much as possible before it gets dark. Before we start filming we will give our actors details on what to do and how to act. We plan to film shots more than once to give ourselves options of choosing which shot is the most effective. I will be in charge of using the camera, Carly will be in charge of the storyboard, and Lydia will be in charge of organising props and the actors costumes.

Day 2: 3rd January 2015
Unfortunately my camera battery ran out of charge and so we had to film again. luckily we had left this date open in case filming extra shots was needed for our opening scene. We all met again at around 3.30pm and filmed the remaining shots. we were all given the same roles as before and managed to work efficiently and successfully. When going back to class we will have more than enough shots to use for our editing process.